Home
Getting Started
Welcome to the guide for PYUI. This and following pages will take you through:
- Installation
- Starting off with a boilerplate project
- Project Structure explanation
- PYUI Build Tools
- PYUI XML rules and Tags
- PYUI API reference
- Advance features (Python Hooks, Data streaming)
- Adding custom tags and using syscall for binding
- Customizing build pipeline
- Much more
Architecture Philosophy
This framework uses the elegance of webview (provided by Pywebview) and using strict xml layout for designing pages and python code for logic. This framework compiles the layouts into 2 parts:
- BIN file (This contains a compiled tree used for optimised object acess)
- .html your strict xml gets compiled to pure safe html to be displayed
By doing this one can produce elegant looking apps with size very less compared to huge frameworks like PYQT yet maintain the modern layouts as it supports css and frameworks like tailwind or bootstrap and more via configuring project properly. We will touch internals of framework later and in debugging section more.
Installation
Installing PYUI (Windows)
1.Get the PYUI using
pip install pyui-desktop
Installing PYUI (Linux)
Because this framework uses pywebview to render native GUI windows, it requires system-level GTK and WebKit libraries.
Follow these steps to set up the system dependencies and install the framework cleanly without running into externally-managed-environment errors.
Step 1: Install System GUI Dependencies
Open your terminal and run the command corresponding to your Linux distribution:
Ubuntu / Debian / Linux Mint / Pop!_OS
sudo apt update
sudo apt install python3-gi python3-gi-cairo gir1.2-gtk-3.0 gir1.2-webkit2-4.1
(Note: If you are on an older version like Ubuntu 20.04, change gir1.2-webkit2-4.1 to gir1.2-webkit2-4.0)
Fedora / Red Hat
sudo dnf install python3-gobject gtk3 webkit2gtk4.1
Arch Linux
sudo pacman -S python-gobject gtk3 webkit2gtk-4.1
Step 2: Set Up Your Virtual Environment
To keep your system clean, you must use a virtual environment.
CRITICAL: You must pass the --system-site-packages flag so that Python can access the system GTK/WebKit graphics libraries you installed in Step 1. Without this flag, the installation will attempt to compile these libraries from source and fail.
# 1. Create the environment with system package access
python3 -m venv .venv --system-site-packages

# 2. Activate the virtual environment
source .venv/bin/activate
Step 3: Install the Framework
Now that your environment is active and connected to your system's graphics engine, you can safely install the package:
pip install pyui-desktop
Starting off with a boilerplate project
mkdir HelloWorldApp
python -m PYUI.create HelloWorldApp
Thats it, go to the directory you mentioned
cd HelloWorldApp
Now Compile for first time
python -m PYUI.buildtools --compileexe ./ --target DEBUG --name HelloWorldApp
Go to the DEBUG directory made and execute
HelloWorldApp.exe
Note: Replace 'HelloWorldApp' with the name of your project.
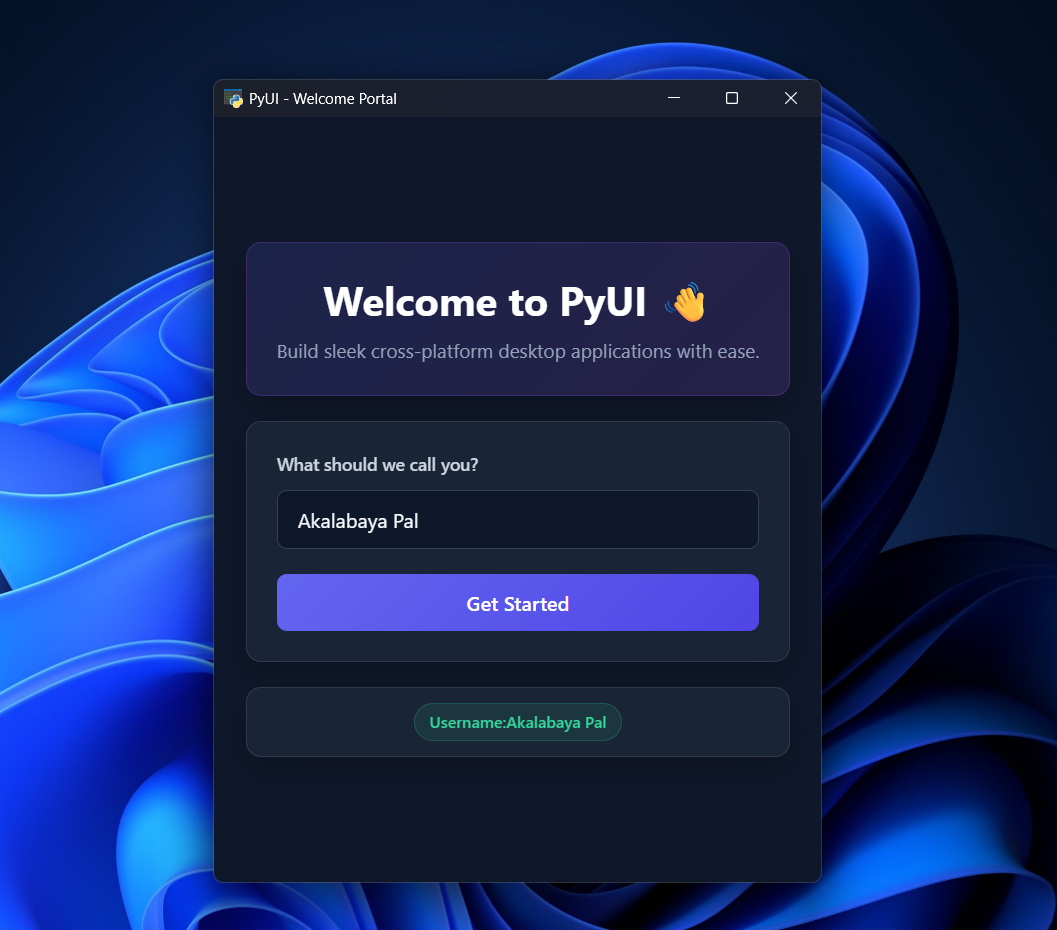
Result: